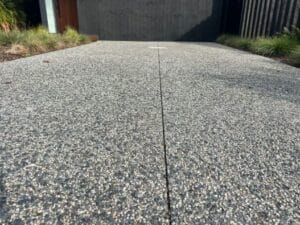
You construct a concrete driveway by planning its layout, excavating the area, installing forms, pouring concrete, and allowing the mixture to cure. It’s important to note that concrete driveway construction may require specialised tools and techniques. That’s why hiring professional concreters in Mornington is recommended to get the best results.
In this post, we’ll learn more about the steps in constructing a concrete driveway.
Steps to Install a Concrete Driveway
The following are the primary steps in installing a concrete driveway:
Step 1: Planning and Permitting
The first step in constructing a concrete driveway is to plan the layout and obtain any necessary permits and permissions. The planning phase involves considering the driveway’s size, shape, and slope and identifying any potential obstacles, such as trees, utility lines, or drainage issues.

Step 2: Excavation and Drainage
Once you have obtained any necessary permits, the next step is to excavate the area where the driveway will be located. This involves removing any grass, soil, or other materials from the site and creating a level base for the driveway. In addition, it is important to ensure proper drainage to prevent water from pooling on the driveway.
Step 3: Base Preparation
After excavating and preparing the site, the next step is creating a sturdy concrete driveway base. This involves adding a layer of crushed stone or gravel to the excavated area and compacting it. One of the best tips for concrete driveway is to have a base thickness of at least 4 inches to ensure stability.
Step 4: Forming the Driveway
Once the base is prepared, the next step is to install forms around the perimeter of the driveway. Forms are typically made of wood or metal and are used to outline the edges of the driveway and prevent the concrete from spreading or flowing into unwanted areas.

Step 5: Pouring the Concrete
Once the forms are in place, the next step is to mix and pour the concrete mixture into the prepared area. The concrete should be mixed according to the manufacturer’s instructions and poured into sections to ensure level and consistency. A screed or a straight edge can be used to level the concrete and create a smooth surface.
Step 6: Finishing the Driveway
After the concrete is poured, the next step is to finish the surface to create the desired texture and appearance. A float or trowel can be used to smooth the surface and remove any excess water or air pockets. If desired, a broom finish can be applied to the surface to create traction and prevent slipping.
Step 7: Curing and Maintenance
Finally, the concrete driveway should be allowed to cure for at least seven days before driving on it. During this time, keeping the surface moist and protected from direct sunlight is important to prevent cracking or other damage. Learn how concrete driveway rebar can benefit your installation by reading our blog about it today.
